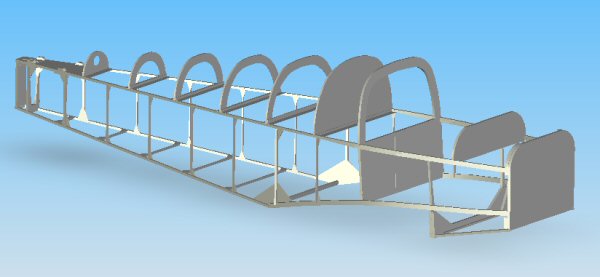
Falconar F11 Fuselage
Falconar F11A Fuselage

If there is no menu bar on left - click here
March 11, 2007
8hrs - 343hrs Total
Started on the F11A fuselage. The first part to be built is the aft most bulkhead, bulkhead 5. The bulkhead is made from Ash and 2 mm plywood. My plan (since I only have a small workshop) is to build all the subcomponents for the fuselage first.
March 17, 2007
4hrs - 347hrs Total
Bulkhead 5 is glued and the top piece of plywood is ready to be installed.
Also, work is in progress on Bulkhead 4. While the sides are made from sitka spruce, the center portion is made from ash. Straight grained, quarter sawn ash is difficult to find in this area so two pieces will be laminated to form the part. The forward potion of the tail wheel assembly will be bolted thru both pieces of ash (bolts running left-to-right in the picture below) so the final strength should be unaffected (if not slightly improved due to the better crack resistance) by the lamination.
March 18, 2007
3hrs - 350hrs Total
Bulkhead 5 is completed.
The sides of the bulkhead were trimmed to 9 degrees. As can be seem by the pencil mark on the left side of the bulkhead, the cut-outs for the fuselage longerons are trimmed slightly undersized. They will be trimmed to final dimensions during the assembly of the fuselage
Bulkhead 4 is coming along nicely. After the second plywood gusset is installed, the sides will also be trimmed to 9 degrees.
I've started the jig for bulkhead 1 - the firewall.
6hrs - 356hrs Total
After a couple of weeks of working on my cars, I finally found time to get back to the aircraft. Bulkhead 4 is completed. The second gusset was installed;
the sides were trimmed to 9 degrees;
and the inner faces were also trimmed to 9 degrees.
Work has continued on Bulkhead 1 - The firewall. I used my standard technique to build this jig. The shape to be built was drawn of a flat surface. Nails were hammered into the periphery of the drawing. After the nail heads were cut off, the entire jig was covered in plastic. The wood was cut and fit into the jig. The nails were bent (leaned) to ensure a nice, tight, accurate fit. The adhesive was mixed and applied to all joints (both sides). After a few minutes, the parts were reinstalled in the jig, clamped, and allowed to dry. Below is a picture of the firewall frame just before it was removed from the jig.
Here is the firewall frame before I cleaned the glue residue. Both sides of the bulkhead will eventually be covered in 2mm plywood. The empty spaces between the frame members will be stuffed with fiberglass insulation. The insulation is to act as a sound barrier and as an addition flame barrier.
Oct 27, 2007
6hrs - 362hrs Total
Bulkhead 2 is started.
Jan 10, 2010
12hrs - 374hrs Total
The fuselage sides are started.
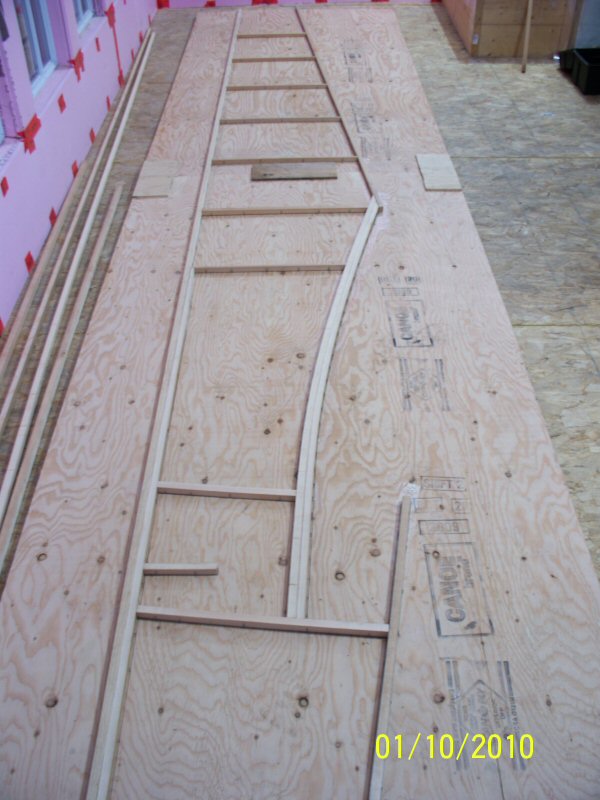
The first item to build was the jig. I used my standard process. I built a surface on which I drew the part to be built. Since the fuselage is almost 16 feet long, 2 sheets of 3/4inch select plywood formed the "canvas".
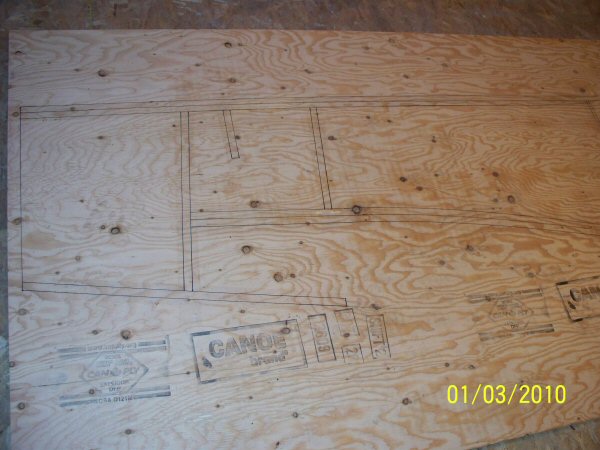
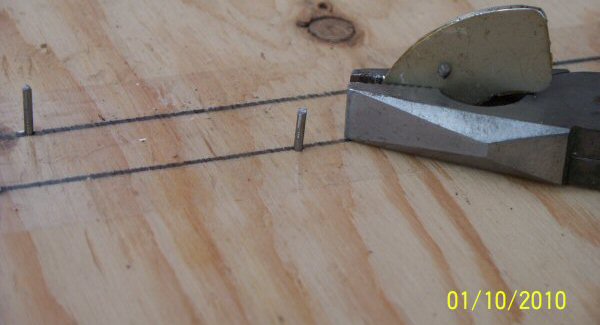
Once the design was transferred to the plywood (once in pencil, and a second time with a fine tip marker - measure twice; cut once!), the lines were covered in transparent tape (to stop the adhesive sticking to the jig) and then nails were driven around the periphery of the drawing.
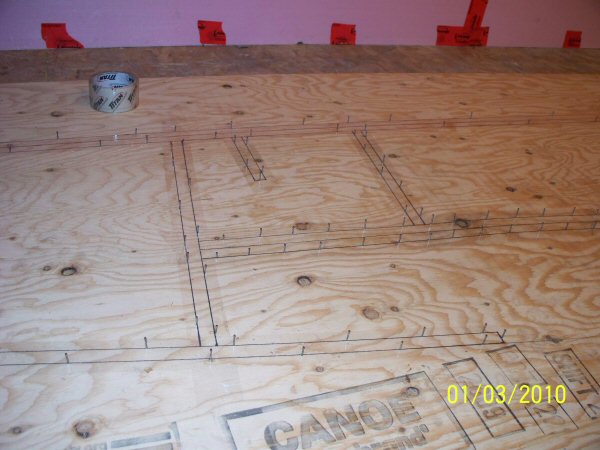
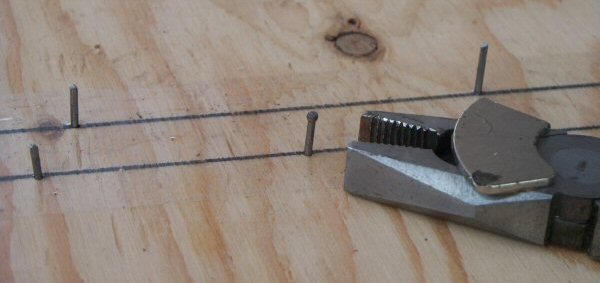
The nail heads were then cut off. The curved metal shape sitting on the pliers is a powerful rare earth magnet to capture the nail heads before they fly off everywhere.
Once the jig was completed, the wood was cut, trimmed and dry installed into the jig.
Jan 24th, 2010
9hrs - 382hrs Total
Work continues on the first fuselage side. The gussets were cut for both fuselage sides.
The two longerons which cross over the wing's surface had to be steam-bent to shape. I used the same technique as I had employed previously. My trusty steam kettle pumping steam into a 2 inch ABS pipe.
20 minutes in this "high tech device" and the wood is very pliable. I built a bending jig that would bend the longerons 5 to 10 degrees more that required. This will allow some spring back as the longerons are removed from the jig.
May 21st, 2012
4hrs - 386hrs Total
Work has restarted on the aircraft. The first order of business was the purchase of additional plywood and new epoxy. The epoxy that was stored for the last two years seems to be good, however "seems" is not good enough when $30 may be the difference between the aircraft holding together or falling apart (in the air!). The epoxy that I've used to build my aircraft was G1 manufactured by Industrial Formulators. The company was purchased by Systsem Three Resins Inc and the G1 epoxy is no longer available. The replacement product is T-88. From what I have read, it is an equivalent product.
I pulled the RH fuselage side from the jig and started to insert the capstrips that will form the LH side. The lower wing to fuselage double longerons that were were steamed and shaped a few days ago, were bonded together and allowed to dry. As can be seen in the image below, I've laid the capstrips into position on the jig.
May 24st, 2012
2hrs - 388hrs Total
The double longerons on the top of the fuselage side were bonded together next.
May 28th, 2012
4hrs - 392hrs Total
After the double longerons were dry, cleaned and sanded, they were reinstalled in the jig. The next step is to glue all the parts together. The surfaces between the mating parts were sanded and epoxy applied per the manufacturer's recommendations. After it had time to dry, the fuselage side was CAREFULLY removed from the jig. The bonds between the capstrips' ends (endgrain) and upper and lower longerons are not very strong so care was required. The excess epoxy was sanded and the gussets were applied. In the picture below, upper fuselage half of the gussets are installed and drying.
May 30th, 2012
2hrs - 394hrs Total
The fwd gusset was installed.
The next day, the lower fuselage side gussets were installed.
June 14, 2012
10hrs - 404hrs Total
The second fuselage side was completed.
I restarted work on Bulkhead 2.
It is really exciting to do the first dry fit of the fuselage.
Dec 31, 2012
45hrs - 449hrs Total
Lots of work - not much progress on the actual aircraft. Purchased additional plywood from http://www.aircraftspruce.ca/ and additonal Sitka Spruce and Ash from http://www.exotic-woods.com. Spent time machining the lumber.
Building a new jig for Bulkhead 2. As can be seen in the picture below, I've machined the caps strips for the rollbar. These will be laminated together and inserted into the bulkhead 2 jig. For readers that follow my construction, you might notice that my workshop is starting to look finished.
Jan 1, 2013
2 hrs - 451hrs Total
Started steaming and shaping the cap strips into the bulkhead 2 jig. I added cap strips in 3 layers, allowing some drying time between layers.
Mar 10, 2013
19 hrs - 470rs Total
15 individual layers glued on one at a time. Lots of 1 hour or so working sessions, sanding, and preping, then some adhesive.......wait a few days for it to dry and start all over. The results are nice.
Also started the assemby of Bulkhead #3.
Mar 13, 2013
6 hrs - 476rs Total
Returned to work on Bulkhead 1. 4 corner reinforcements were installed. I love the quality of the Sitka Spruce I was able to get. See the close-up beow.